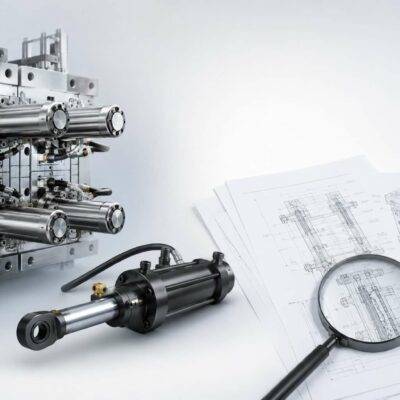

Hydraulic oil leakage is one of the most important issues to investigate when a cylinder is installed inside an injection mold or die-casting application. A visible leak does not necessarily mean that the cylinder itself has a manufacturing or design defect. The origin of the leakage must be identified systematically, considering the sealing system, assembly conditions, mechanical condition of the rod, hydraulic operating parameters and the actual service environment.
A real Vega service case illustrates why a structured diagnostic procedure is essential.
In this case, two hydraulic cylinders of the same type were returned to Vega for technical analysis after oil leakage had been reported during operation. The cylinders were CR080036D0GGGM100 units.
The investigation eventually involved dimensional and geometrical inspections, analysis of the sealing components, examination of the rod surface and a subsequent endurance test under controlled hydraulic conditions.
The objective was not simply to determine whether the cylinders were leaking. The more important question was:
What was actually causing the leakage, and could the cause be attributed to the cylinder itself, its assembly, or the operating conditions?
1. Why an Oil Leak Requires a Technical Investigation
When hydraulic oil appears around a cylinder, it is tempting to immediately conclude that the cylinder has a defective seal.
This conclusion can be misleading.
A hydraulic cylinder contains several interfaces where sealing performance depends on the correct combination of:
- seal geometry;
- seal material;
- groove dimensions;
- surface finish;
- dimensional tolerances;
- assembly procedure;
- rod condition;
- pressure;
- temperature;
- hydraulic fluid;
- operating cycles.
A damaged O-ring, for example, can produce exactly the same visible symptom as a manufacturing problem: oil escaping from the cylinder.
For this reason, the first step should always be to identify the exact location and mechanism of the leakage before deciding what corrective action is required.
2. The First Diagnostic Question: Where Is the Oil Coming From?
The location of the oil is one of the most useful clues during troubleshooting.
A leak may originate from:
Static sealing areas
These are interfaces where two components remain stationary relative to each other.
Typical examples include:
- cartridge-to-body interfaces;
- covers;
- plugs;
- static O-rings;
- threaded connections.
Dynamic sealing areas
These are areas where relative movement occurs.
Typical examples include:
- piston seals;
- rod seals;
- guide systems;
- moving sealing interfaces.
External mechanical damage
A damaged rod can also compromise sealing performance.
For example, a dent, scratch or other surface defect can damage a seal during cylinder movement or create a path through which oil can escape.
This distinction is important because the presence of a damaged seal does not automatically identify why the seal was damaged.
The investigation must continue upstream to determine the cause.
3. The Vega Case: Two Cylinders, Different Findings
In the case examined by Vega, two cylinders were initially subjected to the standard incoming inspection.
The first test lasted approximately 20 minutes, and no abnormality was detected.
This is already an important diagnostic observation.
A cylinder that has reportedly leaked in service but does not leak during an initial controlled test cannot simply be classified as defective without further investigation.
The cylinders therefore underwent additional individual testing on Vega’s test bench, normally used for product validation.
This approach allowed Vega to move from a simple visual complaint — “the cylinder is leaking” — to a controlled technical investigation.
4. Inspection of the Static O-Ring
The technical investigation identified deterioration of the static O-ring of the cartridge carrying the seals as the source of the oil leakage on one of the cylinders.
This is an important distinction.
The investigation did not identify a dimensional or geometrical defect in the relevant components.
Vega carried out dimensional and geometrical checks and did not find anomalies attributable to either manufacturing or design.
The finding therefore shifted the investigation toward the condition of the sealing element and the assembly process.
5. Why the Assembly Process Matters
A static O-ring may appear to be a simple component, but its correct installation is essential to reliable hydraulic sealing.
During assembly, several factors can influence the final condition of the seal.
For example:
- incorrect positioning;
- excessive deformation;
- twisting;
- damage during insertion;
- contamination;
- incorrect assembly conditions.
In this particular case, Vega could not completely exclude the possibility of an assembly error, although no manufacturing or design anomaly was identified.
This is why a hydraulic cylinder investigation should not automatically classify a damaged seal as evidence of a defective cylinder.
The correct technical question is:
Was the sealing element defective, or was it damaged during assembly or operation?
That distinction can have a significant impact on the corrective action.
6. Manufacturing Defect vs. Assembly Issue
A useful diagnostic approach is to separate potential causes into different categories.
Manufacturing or design-related causes
These could include:
- incorrect groove dimensions;
- incorrect tolerances;
- inadequate surface geometry;
- incorrect seal specification;
- dimensional deviations;
- design-related interference.
Assembly-related causes
These could include:
- incorrect installation;
- damaged O-ring during assembly;
- improper positioning;
- contamination;
- incorrect assembly technique.
Operational causes
These could include:
- excessive pressure;
- excessive temperature;
- unsuitable hydraulic fluid;
- excessive cycling;
- abnormal mechanical loads.
External mechanical causes
These could include:
- rod damage;
- impact;
- foreign material;
- incorrect installation of the cylinder;
- interference with surrounding components.
The value of a technical investigation is precisely to distinguish between these possibilities rather than assuming that every failure originates from the manufactured component.
7. The Second Cylinder: Rod Damage
The second cylinder presented a different issue.
An indentation on the rod was identified and was considered relevant to the reported leakage.
The customer questioned how this damage could have occurred because the cylinders were installed inside the mold and, according to the customer’s information, had not been dismantled.
This created an important technical question:
How can a rod become damaged when the cylinder is installed inside a mold and is not normally accessible?
The answer cannot be established simply from the fact that the rod is damaged.
The damage itself has to be examined together with:
- the cylinder installation;
- surrounding mold components;
- possible interference;
- handling procedures;
- assembly operations;
- operating conditions.
8. Why the Rod Surface Is Critical
The rod is not simply a structural component.
It also interacts with the cylinder’s sealing system.
The surface condition of the rod is therefore directly relevant to sealing reliability.
A significant indentation or surface defect can potentially affect the seal as the rod moves through the sealing area.
This is why a technical inspection of a leaking cylinder should include not only the seals but also the condition of the rod surface.
In the Vega case, the rod damage was sufficiently evident that Vega stated that such damage would not have passed unnoticed during the company’s standard pre-shipment testing.
9. 100% Testing Before Shipment
One important element of the investigation was Vega’s standard quality procedure.
According to the technical correspondence, the cylinders are tested 100% on the test bench before shipment, rather than being tested only by sampling.
This provides an important reference point when investigating a subsequent failure.
If a cylinder passes the factory test and a significant mechanical defect is later discovered, the investigation must consider what happened after the cylinder left the factory.
This does not automatically prove where the damage occurred.
However, it provides objective evidence about the condition of the cylinder at the time of the manufacturer’s final test.
10. Why a Second Test Was Necessary
The customer also reported that other cylinders from the same installation appeared to have oil leakage.
This increased the importance of the investigation because the problem could potentially have been related not to one individual cylinder, but to the wider application.
The customer specifically pointed out that oil could remain inside the mold, making it difficult to determine whether the other cylinders were also leaking.
This is an important point for hydraulic systems installed inside molds.
A leakage problem may be difficult to identify visually when:
- the cylinder is enclosed;
- the rod is not easily visible;
- oil remains trapped inside the mold;
- several hydraulic components are located close together.
In these circumstances, controlled testing becomes essential.
11. From Failure Analysis to Endurance Testing
After the initial investigation, the two cylinders were individually installed and tested on Vega’s validation test bench.
The test conditions were:
| Parameter | Test condition |
|---|---|
| Hydraulic fluid | Mineral oil |
| Operating pressure | 160 bar |
| Flow rate | 20 l/min |
| Operating temperature | 65–70 °C |
| Total cycles | 11,000 |
| Total actuations | 22,000 |
These conditions provided a controlled environment in which the cylinders could be operated repeatedly while monitoring their performance.
The result was significant:
No oil leakage or other abnormality was detected during the test.
12. What This Test Tells Us
The endurance test does not erase the findings of the initial investigation.
Instead, it provides another important piece of evidence.
The cylinders were capable of operating for:
11,000 cycles / 22,000 actuations
at:
160 bar
and:
65–70 °C
without producing an oil leak or other abnormality under the controlled test conditions.
This demonstrates the value of reproducing demanding operating conditions on a controlled test bench when investigating a field complaint.
Rather than relying only on visual inspection, the manufacturer can compare:
reported field condition
with
controlled laboratory condition.
That comparison can help narrow down the possible causes of a failure.
13. The Most Important Lesson From the Case
A hydraulic cylinder that leaks in service should not immediately be classified as a defective cylinder.
The correct diagnostic process should ask:
Where is the oil coming from?
↓
Which sealing element is involved?
↓
Is the seal damaged or simply worn?
↓
Are the dimensions and geometry correct?
↓
Is the rod surface intact?
↓
Could assembly have contributed to the damage?
↓
Could the hydraulic conditions have contributed?
↓
Can the reported failure be reproduced under controlled conditions?
This approach transforms a customer complaint into a structured engineering investigation.
The first part of this case showed why an oil leak cannot automatically be interpreted as evidence of a defective hydraulic cylinder.
The investigation had already identified two different findings: deterioration of a static O-ring on one cylinder and visible rod damage on the other. Dimensional and geometrical inspections did not reveal manufacturing or design anomalies.
The next step was therefore essential:
Could the cylinders operate correctly under controlled hydraulic conditions?
This question required more than a short pressure test.
12. Reproducing the Operating Conditions
After the initial inspection, both cylinders were installed and tested individually on Vega’s test bench, the same type of equipment normally used for product validation.
The test was performed using:
- Mineral hydraulic oil
- 160 bar operating pressure
- 20 l/min flow rate
- 65–70 °C operating temperature
- 11,000 cycles
- 22,000 total actuations
These conditions are particularly significant because they subjected the cylinders to a substantial number of repeated movements while maintaining controlled pressure, flow and temperature.
The objective was not simply to see whether the cylinders could move.
The objective was to determine whether they could complete a prolonged operating sequence without reproducing the reported leakage or developing another abnormality.
13. The Result: No Leakage During the Test
The result was clear.
After 11,000 cycles, corresponding to 22,000 actuations, the test did not reveal:
- oil leakage;
- other abnormal behavior.
This result is an important part of the technical analysis.
The cylinders had previously been reported as leaking in the customer’s application. However, when tested individually under controlled conditions, they completed a prolonged endurance test without reproducing the problem.
This does not, by itself, identify the precise cause of the original field problem.
It does, however, provide an important engineering distinction:
A problem observed in an application cannot automatically be reproduced by testing the cylinder alone.
The application and the cylinder must therefore be considered separately.
14. Why Controlled Testing Is So Important
Hydraulic cylinders operate as part of a larger system.
Their actual operating environment may include:
- hydraulic power units;
- pumps;
- valves;
- hoses;
- fittings;
- mold components;
- mechanical loads;
- temperature variations;
- repeated production cycles.
A failure observed in the field can therefore have several possible origins.
For example, a cylinder may show oil leakage, while the actual contributing factor could be associated with:
- the sealing element;
- assembly;
- rod condition;
- mechanical installation;
- operating conditions;
- contamination;
- another component of the hydraulic system.
A controlled test removes many of these variables.
The cylinder is tested under known conditions, allowing the technical team to determine whether the reported symptom can be reproduced independently.
This is one of the most useful principles in hydraulic troubleshooting:
Separate the component from the application before assigning the cause of a failure.
15. The Importance of Pressure, Flow and Temperature
The test conditions used in this investigation are also useful for understanding how hydraulic cylinders should be evaluated.
Pressure
The cylinders were tested at 160 bar.
Pressure determines the force generated by the cylinder and directly affects the mechanical and sealing loads acting on its internal components.
Flow rate
The test used 20 l/min.
Flow determines the speed at which the cylinder moves and therefore contributes to the dynamic conditions experienced by seals, guides and other moving components.
Temperature
The hydraulic fluid was maintained between 65 and 70 °C.
Temperature is particularly relevant because seal behavior, oil viscosity and component clearances can change as the operating temperature changes.
A meaningful validation test therefore needs to consider more than pressure alone.
16. Why a Short Pressure Test Is Not Always Enough
The initial incoming test lasted approximately 20 minutes and did not reveal any abnormality.
This is useful as a basic functional check, but the subsequent endurance test provided a much larger amount of information.
The cylinders were subjected to:
11,000 cycles
rather than simply being pressurized for a short period.
This distinction matters because some failure mechanisms are cumulative.
A seal may appear to operate correctly during a short test but experience progressive wear during repeated movement.
A rod surface defect may become increasingly significant as it passes repeatedly through the sealing system.
A mechanical installation problem may only become evident after many cycles.
Long-duration testing can therefore reveal problems that a short functional test may not reproduce.
17. The Role of the Rod in Leakage Analysis
The rod deserves particular attention whenever leakage is observed.
The sealing system operates directly against the rod surface.
Consequently, the rod must maintain the surface condition required by the sealing system.
In the investigated case, one of the cylinders presented visible rod indentations. Vega stated that such evident damage would not have passed unnoticed during the company’s 100% pre-shipment testing.
This observation is important because it demonstrates why the condition of the rod must be investigated separately from the condition of the seals.
When a seal is damaged, the investigation should therefore ask:
Was the seal the original source of the problem?
or:
Was the seal damaged because it encountered an abnormal rod surface?
The answer can lead to completely different corrective actions.
18. When the Cylinder Is Installed Inside a Mold
The case also highlights a particular difficulty associated with hydraulic cylinders installed inside molds.
The customer questioned how the rod could have become damaged because:
- the cylinders were installed inside the mold;
- the rods were largely inaccessible;
- the cylinders had reportedly not been dismantled.
This concern was explicitly raised during the correspondence.
When a cylinder is integrated into a mold, troubleshooting becomes more complicated because the component may not be easily accessible for visual inspection.
A technician may only discover the problem after:
- oil becomes visible;
- the mold is opened;
- the cylinder is removed;
- or the component is returned to the manufacturer.
For this reason, inspection during mold assembly and maintenance is an important part of hydraulic cylinder reliability.
19. What About the Other Cylinders?
The customer also reported concerns about four additional cylinders.
The issue was difficult to verify because oil from a possible leak could remain inside the mold.
This is another useful lesson for mold builders.
When several hydraulic cylinders are installed inside a confined mold structure, it may be difficult to determine:
- which cylinder is leaking;
- when the leakage started;
- how much oil has escaped;
- whether oil originated from the cylinder or another hydraulic connection.
In such situations, simply observing oil inside the mold is not enough to identify the source.
The cylinders and hydraulic circuit must be inspected systematically.
20. Do Not Confuse a Warranty Decision With Root Cause Analysis
Another important aspect of this case is the distinction between commercial warranty management and technical diagnosis.
For one of the cylinders, Vega could not completely exclude the possibility of an assembly error by its own personnel and therefore recognized the intervention as a commercial warranty.
This commercial decision should not be confused with a technical statement that the cylinder had a manufacturing defect.
The dimensional and geometrical inspections had not identified anomalies attributable to manufacturing or design.
This distinction is valuable in engineering support:
Warranty decision ≠ root cause determination
A manufacturer can decide to support a customer commercially while continuing to investigate the technical origin of a failure.
21. What the Case Actually Demonstrated
The investigation produced several independent pieces of evidence.
Finding 1 — Static sealing
One cylinder showed deterioration of the static O-ring of the cartridge carrying the seals.
Finding 2 — Dimensional inspection
Dimensional and geometrical checks did not reveal anomalies attributable to manufacturing or design.
Finding 3 — Rod condition
The second cylinder showed visible rod indentations.
Finding 4 — Factory testing
Vega stated that cylinders are tested 100% before shipment, rather than through sampling.
Finding 5 — Endurance validation
Both cylinders subsequently completed 11,000 cycles / 22,000 actuations at 160 bar, 20 l/min and 65–70 °C without oil leakage or other abnormality during the test.
Taken together, these findings show why failure analysis cannot be reduced to the simple statement:
“The cylinder leaked, therefore the cylinder was defective.”
22. A Structured Diagnostic Procedure for Hydraulic Cylinder Leakage
Based on the engineering approach demonstrated by this case, a useful troubleshooting sequence is:
Step 1 — Identify the exact leakage point
Determine whether the oil originates from:
- a static interface;
- a dynamic seal;
- a hydraulic connection;
- the rod area;
- another component.
Step 2 — Inspect the sealing elements
Look for:
- cuts;
- deformation;
- deterioration;
- extrusion;
- unusual wear;
- contamination.
Step 3 — Inspect the rod
Check for:
- scratches;
- dents;
- corrosion;
- abnormal wear;
- surface damage.
Step 4 — Check dimensions and geometry
Verify that the relevant components conform to the required specifications.
Step 5 — Investigate assembly
Consider whether the sealing system could have been damaged during assembly or maintenance.
Step 6 — Review operating conditions
Check:
- pressure;
- flow;
- temperature;
- hydraulic fluid;
- number of cycles.
Step 7 — Separate cylinder testing from machine testing
If possible, remove application-specific variables by testing the cylinder independently on a controlled test bench.
Step 8 — Perform an endurance test when necessary
A short functional test may not reproduce a problem that develops progressively during production.
Step 9 — Compare the results
The final diagnosis should be based on the combination of:
field evidence + component inspection + dimensional inspection + controlled testing.
23. The Difference Between a Symptom and a Cause
This case demonstrates a fundamental engineering principle.
The symptom was:
Oil leakage.
But the investigation revealed different physical findings:
deterioration of a static O-ring on one cylinder;
and:
mechanical damage to the rod on another cylinder.
The technical investigation also established that the cylinders could subsequently complete a prolonged controlled test without leakage.
Therefore, the correct engineering approach is not to start with:
“Which seal should we replace?”
It is to start with:
“What evidence can tell us why the leakage occurred?”
This change in approach can prevent unnecessary component replacement and help distinguish a cylinder problem from an application or assembly problem.
24. What Mold Designers and Maintenance Teams Should Check
For hydraulic cylinders installed inside injection molds or other compact tooling, several preventive checks are particularly useful.
Before commissioning:
- inspect the rod surface;
- verify the cylinder installation;
- check hydraulic connections;
- verify the hydraulic fluid;
- confirm operating pressure and flow;
- verify the expected operating temperature.
During maintenance:
- protect the rod from mechanical damage;
- avoid contaminating the sealing area;
- inspect O-rings and seals before reassembly;
- verify the condition of the rod;
- investigate the source of any oil inside the mold before simply replacing seals.
During troubleshooting:
- document the exact leakage location;
- photograph the damaged components;
- record operating conditions;
- determine whether one or several cylinders are affected;
- test the cylinder independently whenever possible.
The objective should always be to preserve the evidence that can reveal the root cause.
25. Conclusion: Diagnose Before You Replace
The investigation of these two hydraulic cylinders demonstrates why professional troubleshooting requires more than replacing a seal and returning the cylinder to production.
The initial inspection identified different physical conditions on the two cylinders. Dimensional and geometrical checks did not reveal manufacturing or design anomalies, while the subsequent controlled endurance test showed that both cylinders could operate for 11,000 cycles and 22,000 actuations at 160 bar, 20 l/min and 65–70 °C without leakage or other abnormality.
The key lesson is therefore not that every hydraulic leak has the same cause.
It is exactly the opposite.
Different leakage symptoms can have different causes, even when the visible problem appears identical.
A static O-ring can deteriorate.
A rod can be mechanically damaged.
An assembly process can influence seal performance.
An application can create conditions that cannot be reproduced on a standard factory test.
For this reason, reliable hydraulic maintenance should follow a structured sequence:
Identify → inspect → measure → test → reproduce → diagnose → correct.
Replacing the failed component may restore operation temporarily.
Finding the reason why it failed is what prevents the same problem from returning.
Useful Vega Links
For readers who want to investigate hydraulic-cylinder leakage, maintenance and hydraulic-fluid selection in greater depth:
- Hydraulic cylinder oil leakage – finding the real cause — useful complementary article on systematic troubleshooting of leakage, including pressure, contamination and alignment.
- When the Cylinder Is Not the Problem — focuses on root-cause analysis when repeated seal replacement does not solve leakage.
- Which Fluids are Best for a Hydraulic Cylinder? — useful for understanding the relationship between hydraulic fluid, viscosity, friction and seal life.
- Vega Hydraulic Cylinder Support Articles — collection of Vega technical articles covering maintenance, troubleshooting and hydraulic-cylinder applications.