A Step-by-Step Guide to Preload Adjustment with the RF…211E Flange
Preload adjustment is an important part of installing a self-locking hydraulic cylinder in an injection mold.
In applications where a slide, plug, core or punch must remain firmly against the mold during injection, simply reaching the locking position is not always sufficient. The elastic deformation of the cylinder rod and of the connected mold components must also be considered.
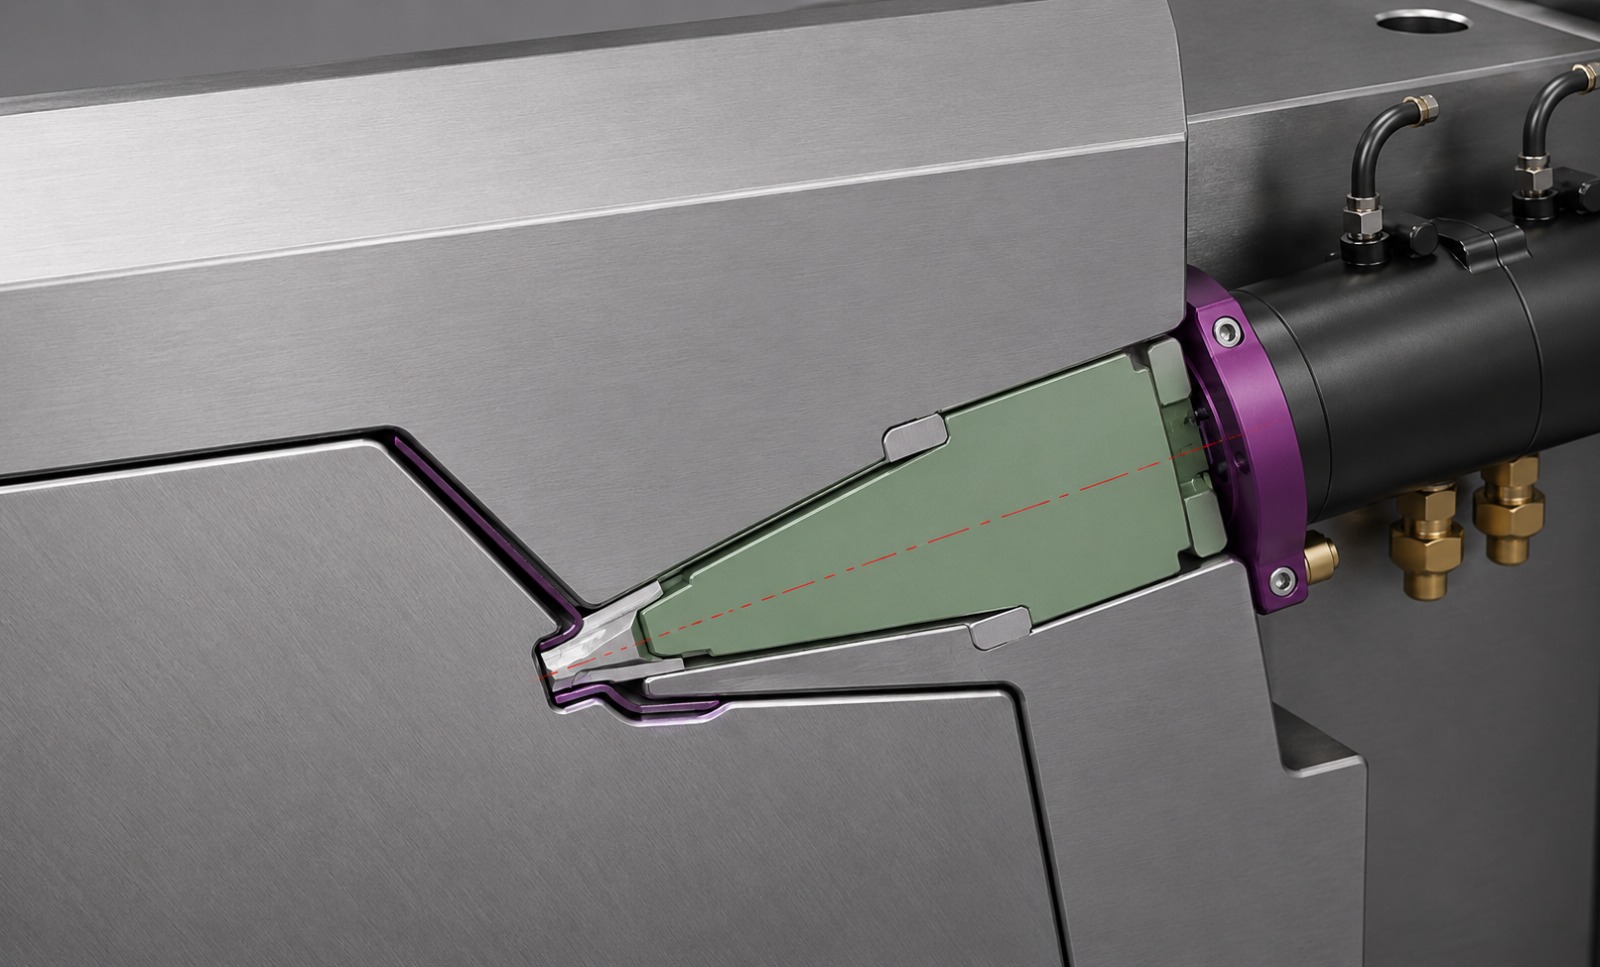
Vega’s preload system is designed to pre-compress the cylinder rod before the injection phase, compensating for the elastic deformation that occurs when the locking system is subjected to the static force generated by injection pressure.
This guide explains the procedure described by Vega for setting the preload using the RF…211E adjustable preload flange.
Important: This procedure should be performed by qualified personnel familiar with hydraulic cylinders and injection molds. The values and procedure below are taken from the Vega technical instructions and should not be replaced by assumptions based on general hydraulic practice.
1. What Is Preload?
Before adjusting the cylinder, it is important to understand what Vega means by preload.
Every mechanical component has a certain degree of elasticity. When an external force is applied, the component can deform slightly. When the force is removed, the component tends to return toward its original shape, provided the deformation remains within its elastic range.
In the case of the V270CG self-locking cylinder, the component subject to the greatest absolute elastic deformation is the cylinder rod.
During injection, an axial force is generated by the plastic injection pressure acting on the front surface of the plug or core. The mechanical locking system, assisted by hydraulic pressure, reacts against this force.
Because of its length and cross-sectional area, the rod undergoes elastic compression under these forces.
If this elastic deformation is not compensated for, the plug or core can move slightly away from the die.
2. Why Is Preload Necessary?
In injection-mold applications, slides and plugs often close directly against the die.
If the plug or core moves away from the die, even by a small amount, molten plastic can penetrate into the resulting gap.
This can produce:
- flash;
- burrs;
- material seepage;
- aesthetic defects;
- functional defects;
- rejected molded parts.
The purpose of preload is therefore not simply to increase the hydraulic force.
Its purpose is to pre-compress the rod before injection, so that the elastic deformation caused by the maximum static locking force is compensated for.
3. Preload Is a Compression of the Rod Before Injection
The basic principle is:
Cylinder locked
→
Rod pre-compressed
→
Injection pressure applied
→
Rod undergoes elastic compression
→
Preload compensates for the expected deformation
→
Plug/core remains correctly positioned
The preload must therefore be selected according to the cylinder configuration and the expected elastic deformation.
It should not simply be increased as much as possible.
Vega’s instructions specifically warn that excessive preload can interfere with correct locking and can also compromise unlocking.
4. The Mold Components Must Also Be Considered
One of the most important details in Vega’s instructions is that the rod is not the only component that can deform.
The preload values in the table take the elasticity/compression of the rod into account, but the elasticity of the slide, core or other component connected to the cylinder rod must also be considered.
Therefore, when designing the mold, the engineer should consider the complete mechanical chain:
Cylinder rod
→
Flange
→
Slide/core/punch
→
Mold structure
The total elastic behavior of this assembly influences the final preload requirement.
5. Preload Must Be Planned During Mold Design
Vega recommends planning the preload operation during the mold design phase.
The design should provide a mechanical reference or feedback from the plug/core.
This reference is subsequently used during assembly to establish a precise “0” position, meaning that the plug or core is perfectly closed against the die.
This is extremely important.
The preload procedure should not begin by randomly rotating the cylinder.
First, the mold must have a known mechanical reference position.
The sequence is:
Design reference
↓
Plug/core completely closed
↓
Establish mechanical “0”
↓
Install cylinder
↓
Set preload
This gives the technician a reproducible starting point.
6. Which Flange Should Be Used?
Vega recommends the RF…211E flange with preload adjustment as the practical and immediate solution for setting the preload.
The important advantage of the adjustable flange is that the preload can be adjusted even with the mold installed in the injection press, provided that:
- the cylinders are accessible;
- sufficient lateral working space is available;
- the operator can safely work around the mold at temperature.
This makes the 211E flange particularly useful during mold trials.
7. What If a Non-Adjustable RF…271C Flange Is Used?
Vega also provides a non-adjustable flange, identified as RF…271C.
When this flange is used, preload must be created by modifying the flange itself.
According to the instructions, this can be done by:
- grinding the flange on the side that contacts the mold, or
- alternatively, inserting a shim between the accessory and the rod end equal to the required preload value.
Vega notes that the shim solution is not recommended.
This procedure may also be difficult to carry out during mold testing.
For this reason, Vega recommends the adjustable RF…211E flange as the practical solution.
8. Determine the Maximum Permitted Preload
Before performing the adjustment, identify the cylinder bore and stroke and consult the preload table.
For example, the Vega table gives the following values for a 36 mm bore:
| Bore | Stroke | Maximum preload |
|---|---|---|
| 36 mm | 35 mm | 0.10 mm |
| 36 mm | 70 mm | 0.13 mm |
| 36 mm | 100 mm | 0.15 mm |
| 36 mm | 120 mm | 0.17 mm |
These are the maximum preload values specified in the Vega instructions.
For example, if the application uses a 36 mm bore and 100 mm stroke, the maximum preload specified is:
0.15 mm
This value should not be exceeded simply to try to eliminate flash.
9. Maximum Preload Is Not Automatically the Correct Preload
This distinction is critical.
The table gives the maximum preload, not necessarily the value that should always be used.
The correct value depends on the application and the actual behavior of the mold.
Vega’s procedure uses the first molding shots to evaluate the result. If material seepage or burrs are still present, the preload can be increased according to the procedure.
If increasing preload causes the burr to increase proportionally, this can indicate that the preload has become excessive and should be reduced.
10. The 1 mm Reference Used During Adjustment
The Vega procedure establishes a 1 mm reference gap between the flange and the perpendicular plane of the cartridge.
This is checked using special adjustment flat shims.
This 1 mm reference is then used to calculate the shim thickness needed to establish the desired preload.
For example:
Initial gap = 1.00 mm
Required preload = 0.15 mm
Therefore:
Adjustment shim = 1.00 − 0.15 = 0.85 mm
Vega gives exactly this example in the instructions.
This is the practical calculation used during adjustment.
11. Tools Required
The Vega instructions refer to several tools required during the procedure.
You will need, as applicable:
- the appropriate RF…211E adjustable preload flange;
- special adjustment flat shims;
- a screwdriver for widening the locking bushings;
- the appropriate fixed key for rotating the cylinder;
- tools for tightening the flange/cylinder fixing screw;
- tools for tightening the locking-bushing grub screws;
- the special screws supplied for fixing the flange to the mold;
- Prussian Blue test paste for checking the contact between the plug/core and die.
The adjustment flat shims are not supplied by Vega, according to the instructions.
12. Step 1 – Loosen the Locking-Bushing Grub Screws
The first mechanical operation in the Vega procedure is to partially loosen the securing grub screws for the locking bushings.
Do not remove the screws unnecessarily.
The objective is to release the components sufficiently to permit the subsequent adjustment.
13. Step 2 – Loosen the Flange/Cylinder Fixing Screw
Next, loosen the flange/cylinder fixing screw.
This allows the cylinder and flange assembly to be adjusted during the subsequent operations.
14. Step 3 – Open the Locking Bushings
Using a screwdriver, widen the locking bushings apart.
This prepares the locking mechanism for the correct installation and adjustment of the flange.
15. Step 4 – Screw the Flange Onto the Cylinder
The next step is to screw the flange onto the cylinder.
At this stage, the flange is installed but the final preload has not yet been established.
16. Step 5 – Establish the 1 mm Reference
This is one of the most important steps.
Leave 1 mm of space between the flange and the perpendicular plane of the cartridge.
Vega specifies that this should be checked using the appropriate adjustment flat shims.
The 1 mm dimension is the reference from which the preload is subsequently established.
Do not skip this step.
17. Step 6 – Tighten the Flange/Cylinder Fixing Screw
Once the 1 mm reference has been correctly established, screw and tighten the flange/cylinder fixing screw.
18. Step 7 – Tighten the Locking-Bushing Grub Screws
Next, tighten the grub screws for the locking bushings.
The flange is now prepared for installation on the mold.
19. Step 8 – Install the Flange and Cylinder on the Mold
Fix the flange together with the cylinder to the mold using the special screws supplied.
At this stage, the cylinder must be correctly positioned relative to the plug, core, slide or punch.
20. Step 9 – Extend the Rod and Establish Point “0”
Now place the cylinder with the rod fully extended.
The objective is to verify that the plug/core closes correctly against the die.
This is the mechanical reference known as point “0”.
Vega recommends using blue Prussian Blue test paste, commonly used in mechanical engineering to check mating/contact surfaces.
Apply the test paste according to the normal contact-check procedure and verify the mating condition.
If there is a dimensional error compared with the design specification, the components must be checked before continuing.
21. Why Point “0” Is So Important
The preload must be established relative to the position in which the plug/core is perfectly closed against the die.
Without a reliable mechanical zero, the preload adjustment could compensate for an incorrect mold dimension rather than correctly compensating for elastic deformation.
The correct sequence is therefore:
Check mold geometry
→
Close plug/core
→
Verify contact
→
Establish point “0”
→
Adjust preload
22. Step 10 – Retract the Cylinder Rod
Once point “0” has been verified, place the cylinder with the rod retracted.
This prepares the assembly for the actual preload adjustment.
23. Step 11 – Loosen the Grub Screws Again
Loosen the grub screws behind the locking bushings.
This releases the components sufficiently for the cylinder rotation required to set the preload.
24. Step 12 – Loosen the Flange/Cylinder Fixing Screw Again
Next, loosen the flange/cylinder fixing screw.
The cylinder can now be rotated to establish the required preload.
25. Step 13 – Calculate the Required Shim Thickness
This is the key calculation.
The starting reference is:
1.00 mm
The desired preload is then subtracted from this value.
Example: 0.15 mm preload
1.00 mm − 0.15 mm = 0.85 mm
Therefore, an 0.85 mm flat shim is inserted.
The cylinder is then slowly rotated using the appropriate fixed key.
The objective is for the 0.85 mm shim to become trapped between the perpendicular plane of the cartridge and the flange.
This corresponds to the specified 0.15 mm preload.
26. Example for a 36 mm × 100 mm Cylinder
For a V270CG configuration with:
- bore = 36 mm
- stroke = 100 mm
the maximum preload specified in the Vega table is:
0.15 mm.
Using the 1 mm reference:
1.00 − 0.15 = 0.85 mm
Therefore:
Flat shim = 0.85 mm
The cylinder is slowly rotated until the 0.85 mm shim becomes stuck between the specified surfaces.
This is the exact example provided in the Vega instructions.
27. Step 14 – Tighten the Flange/Cylinder Fixing Screw
Once the correct preload has been established, lock the flange/cylinder fixing screw.
This secures the adjusted position.
28. Step 15 – Tighten the Locking-Bushing Grub Screws
Next, tighten the grub screws for the locking bushings.
The mechanical preload adjustment is now complete.
29. Step 16 – Extend the Rod and Perform the First Molding Shots
Place the cylinder with the rod fully extended.
Then perform the first molding shots.
The purpose is to check the molded parts for:
- defects;
- burrs;
- material seepage.
Vega specifically recommends checking whether the preload has eliminated the material seepage problem.
30. If Burrs Are Still Present
If the molded component is not acceptable and material seepage or burrs remain, Vega’s procedure is to repeat the adjustment process.
The preload can be increased according to the amount of burr observed, followed by additional molding trials.
The important point is that the adjustment is iterative.
The objective is not automatically to set the maximum preload.
Instead:
Set preload
→
Mold
→
Inspect part
→
Evaluate burr/material seepage
→
Adjust if necessary
→
Mold again
31. Do Not Automatically Increase the Preload
Vega provides an important warning.
If increasing the preload also causes the amount of burr to increase proportionally, this may indicate that the preload is excessive.
In this situation, the preload must be reduced by rotating the cylinder counterclockwise relative to the adjustment direction described in the procedure.
This is an important practical diagnostic.
More preload does not necessarily mean better sealing.
32. Excessive Preload Can Affect Unlocking
Too much preload can cause problems beyond flash.
Vega specifically warns that excessive preload can:
- prevent correct locking;
- compromise proper unlocking;
- potentially leave the block/punch locked.
Therefore, preload must remain within the specified range and be adjusted according to the actual behavior of the mold.
33. A Critical Hydraulic Requirement: 120 Bar
The mechanical adjustment is only one part of the procedure.
Vega specifies an important hydraulic requirement for correct operation of the mechanical locking system.
During the entire injection phase, a constant pressure of 120 bar in the pushing direction must be maintained.
This is a critical operating condition.
The preload should therefore not be considered a substitute for the required hydraulic pressure.
The mechanical locking system and hydraulic pressure work together.
34. What If 120 Bar Cannot Be Maintained?
Vega specifies that if maintaining a constant 120 bar push pressure throughout the injection phase is not possible, a pilot-operated check valve must be used.
The valve should be installed:
- directly on the cylinder;
- using a nipple or other rigid fitting.
Vega specifically states:
Do not use hoses to connect the valve to the cylinder.
This is a particularly important installation requirement and should not be omitted from the mold design.
35. Why the Valve Must Be Installed Directly on the Cylinder
The Vega instructions do not provide a detailed engineering explanation for the rigid connection requirement.
Therefore, we should not add an unsupported explanation.
The documented requirement is simply:
If constant 120 bar cannot be maintained → use a pilot-operated check valve directly on the cylinder → use a rigid fitting → do not use a hose between valve and cylinder.
This should be treated as a specific Vega installation requirement.
36. Purging the Hydraulic Circuit
After installation, and before using the system, Vega instructs the installer to purge the cylinder and valve.
The purpose is to remove possible air bubbles trapped in the oil circuit.
This step should therefore be included in the commissioning procedure.
The basic sequence is:
Install cylinder
↓
Install valve if required
↓
Connect hydraulic circuit
↓
Purge trapped air
↓
Verify operation
↓
Proceed with molding
37. Complete Preload Procedure – Quick Reference
For practical use, the entire Vega procedure can be summarized as follows.
Preparation
- Confirm cylinder bore and stroke.
- Determine the maximum permissible preload from the Vega table.
- Prepare the RF…211E adjustable preload flange.
- Prepare the required adjustment flat shims.
- Ensure the mold provides a reliable mechanical reference for point “0”.
Initial flange setup
- Partially loosen the locking-bushing grub screws.
- Loosen the flange/cylinder fixing screw.
- Widen the locking bushings using a screwdriver.
- Screw the flange onto the cylinder.
- Establish a 1 mm gap using the adjustment flat shims.
- Tighten the flange/cylinder fixing screw.
- Tighten the locking-bushing grub screws.
- Fix the flange/cylinder assembly to the mold.
Establishing zero
- Extend the cylinder rod fully.
- Close the plug/core against the die.
- Verify contact using Prussian Blue test paste.
- Confirm the mechanical point “0”.
- Correct any dimensional error before continuing.
Preload adjustment
- Retract the cylinder rod.
- Loosen the locking-bushing grub screws.
- Loosen the flange/cylinder fixing screw.
- Calculate the adjustment shim:
1 mm − required preload = shim thickness
- Insert the calculated shim.
- Slowly rotate the cylinder until the shim becomes trapped.
- Tighten the flange/cylinder fixing screw.
- Tighten the locking-bushing grub screws.
Validation
- Fully extend the rod.
- Perform initial molding shots.
- Inspect for burrs/material seepage.
- If necessary, adjust preload and repeat the molding test.
- If increasing preload increases burr formation, reduce the preload.
- Verify that locking and unlocking remain correct.
Hydraulic commissioning
- Maintain 120 bar push pressure throughout injection.
- If this cannot be maintained, install the specified pilot-operated check valve directly on the cylinder.
- Do not use a hose between the valve and cylinder.
- Purge the cylinder and valve before operation.
38. Worked Example
Consider a cylinder with:
- 36 mm bore
- 100 mm stroke
According to the Vega table:
Maximum preload = 0.15 mm.
The initial reference is:
1.00 mm
The required adjustment shim is therefore:
1.00 − 0.15 = 0.85 mm
The cylinder is rotated slowly until the 0.85 mm shim becomes trapped between the perpendicular plane of the cartridge and the flange.
After securing the flange and locking bushings, the cylinder is returned to the fully extended position and molding trials are performed.
If the molded component is satisfactory, the adjustment can be retained.
If material seepage remains, the procedure can be repeated with an appropriate increase in preload, provided the maximum permissible value is not exceeded.
39. Preload Values Listed in the Vega Instructions
For reference, the document provides the following maximum preload values:
| Bore | Stroke | Maximum preload |
|---|---|---|
| 30 mm | 30 mm | 0.20 mm |
| 30 mm | 60 mm | 0.25 mm |
| 30 mm | 90 mm | 0.31 mm |
| 30 mm | 120 mm | 0.36 mm |
| 36 mm | 35 mm | 0.10 mm |
| 36 mm | 70 mm | 0.13 mm |
| 36 mm | 100 mm | 0.15 mm |
| 36 mm | 120 mm | 0.17 mm |
| 45 mm | 45 mm | 0.15 mm |
| 45 mm | 90 mm | 0.19 mm |
| 45 mm | 120 mm | 0.22 mm |
| 45 mm | 150 mm | 0.25 mm |
| 56 mm | 50 mm | 0.15 mm |
| 56 mm | 100 mm | 0.19 mm |
| 56 mm | 120 mm | 0.20 mm |
| 56 mm | 150 mm | 0.23 mm |
| 71 mm | 60 mm | 0.20 mm |
| 71 mm | 120 mm | 0.26 mm |
| 71 mm | 150 mm | 0.28 mm |
| 84 mm | 75 mm | 0.20 mm |
| 84 mm | 150 mm | 0.26 mm |
| 84 mm | 200 mm | 0.30 mm |
These values are taken directly from the Vega preload table.
40. Important Design Considerations
There are several points that should be considered before the cylinder is installed.
1. Provide access
The RF…211E flange can be adjusted with the mold in the press, but only if the cylinder is accessible and there is sufficient lateral space for the operator.
2. Consider hydraulic-port orientation
Rotating the cylinder during preload adjustment can also change the position of:
- oil inlet ports;
- hydraulic hoses;
- sensors;
- sensor cables.
This must be considered during mold design.
3. Avoid interference
If rotating the cylinder causes interference between fittings/pipes and other mold components, Vega specifies the use of a spacer between the rod and the slide/core equal to the indicated preload value.
4. Consider component elasticity
The preload table accounts for rod elasticity, but the elasticity of the slide/core or other connected component must also be considered.
41. Preload Is a Mold-Design Function, Not Just a Cylinder Adjustment
One of the most important conclusions from Vega’s instructions is that preload should be considered during mold design, rather than being treated as a last-minute cylinder adjustment.
The mold should provide:
- a reliable mechanical zero;
- access to the flange;
- sufficient adjustment space;
- sufficient space for hydraulic connections;
- sufficient space for sensors;
- correct cylinder alignment;
- a suitable mechanical connection to the slide/core.
Vega specifically recommends planning the preload operation during mold design and providing mechanical feedback of the plug/core.
42. Final Checklist Before Running the Mold
Before starting production, verify:
Mechanical
- Cylinder bore and stroke confirmed.
- Correct maximum preload identified.
- RF…211E flange installed.
- 1 mm reference established.
- Point “0” verified.
- Plug/core contact checked.
- Required preload established.
- Flange fixing screw tightened.
- Locking-bushing grub screws tightened.
- No mechanical interference.
- Cylinder can complete the required stroke.
Hydraulic
- Hydraulic connections correctly installed.
- 120 bar push pressure available throughout injection.
- If not, pilot-operated check valve installed directly on cylinder.
- Rigid fitting used between valve and cylinder.
- No hose used between valve and cylinder.
- Cylinder and valve purged of trapped air.
Molding
- First shots performed.
- Parts inspected for burrs/material seepage.
- Preload adjusted if necessary.
- Locking function verified.
- Unlocking function verified.
- No excessive preload condition observed.
Conclusion
Correct preload adjustment is an essential part of using a self-locking hydraulic cylinder in applications where a plug, core, slide or punch must remain firmly closed against the die during injection.
The purpose of preload is to pre-compress the cylinder rod before injection, compensating for the elastic deformation produced by the static locking force.
The procedure is based on a clearly defined mechanical reference:
1 mm initial reference
minus
required preload
equals
adjustment shim thickness.
For example, with a 36 mm bore and 100 mm stroke, Vega specifies a maximum preload of 0.15 mm. The corresponding adjustment shim from the 1 mm reference is therefore 0.85 mm.
The procedure must then be validated through actual molding trials. If burrs remain, preload can be increased within the specified limits; if increasing preload increases the burr, the preload may be excessive and must be reduced.
Finally, the mechanical adjustment must be combined with the correct hydraulic operating conditions. Vega specifies 120 bar constant push pressure throughout the injection phase; if this cannot be maintained, a pilot-operated check valve must be installed directly on the cylinder using a rigid connection, without a hose between the valve and cylinder. The cylinder and valve must also be purged before operation.
The key principle is simple: preload should be calculated, mechanically established from a reliable zero position, tested during molding, and never increased blindly.